

This is a follow-up of my tutorial: ”Creating an Inventor addin”. In one of the chapters I wrote how to add a button to your addin. But I left out how to add an icon to that button. Because it need some explanation and I did find the tutorial already quite long.
The problem with icons (and other images/thumbnails) is that Inventor uses some very old techniques. Have a look at this post from 2012 (yes that post is 10 years old.) And even then it was almost obsolete. But the class proposed in that post is still working. (At least the C# version works, the VB.net version needs some modifications) And as far as I know it is still the only way to convert, the .Net image object to the object type IPictureDisp, that is used by Inventor. Therefore we can (shamelessly) copy that code to our addin.
Dll references
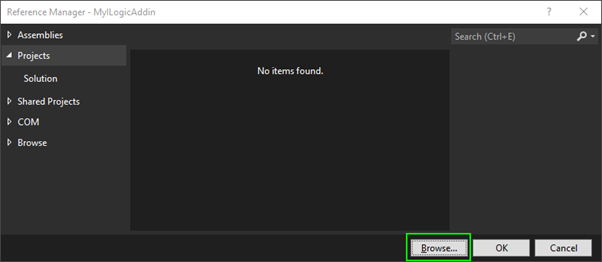
But first we need to add references to some dll’s. Go to the “Add reference” screen.

Browse and select the following files:
C:\Program Files\Autodesk\Inventor [VERSION]\Bin\stdole.dll
In my case, I used the WPF technology for my forms. But we need some Winforms dll to make this work. Therefore I need to add some extra references. If you have chosen another project type, when you created the Visual Studio project, then maybe you already have the reference. If you are not sure just follow along. (Go to the “Add reference” screen again if you closed it.) Select: “Assemblies” and then search for and select “System.Drawing”.

Converter Class
Add a new class to the project and name it “PictureDispConverter”. Copy the following code to the file:
Imports System.Runtime.InteropServices

Public NotInheritable Class PictureDispConverter


    <DllImport("OleAut32.dll", EntryPoint:="OleCreatePictureIndirect", ExactSpelling:=True, PreserveSig:=False)>
    Private Shared Function OleCreatePictureIndirect(
                <MarshalAs(UnmanagedType.AsAny)> ByVal picdesc As Object,
                ByRef iid As Guid,
                <MarshalAs(UnmanagedType.Bool)> ByVal fOwn As Boolean) As stdole.IPictureDisp
    End Function

    Shared iPictureDispGuid As Guid = GetType(stdole.IPictureDisp).GUID

    Private NotInheritable Class PICTDESC

        Private Sub New()
        End Sub

        Public Const PICTYPE_UNINITIALIZED As Short = -1
        Public Const PICTYPE_NONE As Short = 0
        Public Const PICTYPE_BITMAP As Short = 1
        Public Const PICTYPE_METAFILE As Short = 2
        Public Const PICTYPE_ICON As Short = 3
        Public Const PICTYPE_ENHMETAFILE As Short = 4

        <StructLayout(LayoutKind.Sequential)>
        Public Class Icon
            Friend cbSizeOfStruct As Integer = Marshal.SizeOf(GetType(PICTDESC.Icon))
            Friend picType As Integer = PICTDESC.PICTYPE_ICON
            Friend hicon As IntPtr = IntPtr.Zero
            Friend unused1 As Integer
            Friend unused2 As Integer

            Friend Sub New(ByVal icon As System.Drawing.Icon)
                Me.hicon = icon.ToBitmap().GetHicon()
            End Sub

        End Class

        <StructLayout(LayoutKind.Sequential)>
        Public Class Bitmap
            Friend cbSizeOfStruct As Integer = Marshal.SizeOf(GetType(PICTDESC.Bitmap))
            Friend picType As Integer = PICTDESC.PICTYPE_BITMAP
            Friend hbitmap As IntPtr = IntPtr.Zero
            Friend hpal As IntPtr = IntPtr.Zero
            Friend unused As Integer

            Friend Sub New(ByVal bitmap As System.Drawing.Bitmap)
                Me.hbitmap = bitmap.GetHbitmap()
            End Sub
        End Class
    End Class

    Public Shared Function ToIPictureDisp(ByVal icon As System.Drawing.Icon) As stdole.IPictureDisp
        Dim pictIcon As New PICTDESC.Icon(icon)
        Return OleCreatePictureIndirect(pictIcon, iPictureDispGuid, True)
    End Function

    Public Shared Function ToIPictureDisp(ByVal bmp As System.Drawing.Bitmap) As stdole.IPictureDisp
        Dim pictBmp As New PICTDESC.Bitmap(bmp)
        Return OleCreatePictureIndirect(pictBmp, iPictureDispGuid, True)
    End Function
End Class
(This is the code that I copied from the post and updated a bit. As a reference, I recently found this article. I would not be surprised if this is the source of the Autodesk article)
Button bitmap images
When you select images for a button you need to look out for the following. You can use 2 images a “standard” and a “Large” bitmap image. A “standard” size icon is 16 pixels wide and 16 pixels high. A large size icon is 32 wide by 32 high. (If not supplied and a standard size icon is supplied a large icon will be automatically created by scaling the standard size icon. Because scaling a bitmap does not necessarily create a good image, it is recommended that you supply a large bitmap.)
First, create a directory to add the images. Right-click the project file -> “Add” -> “New Folder”.

Now copy the images that you want to use for your button to this folder. You can open the folder in the file explorer by right-clicking the folder in your solution explorer and then selecting “Open folder in file explorer”.

I copied 2 files “MyImage16x16.png” and “MyImage32x32.png”. Your images can be named different. But then you need to remember how they are called so you can use the correct names in the code.
Open your project properties and go to Recourses.

Select “Add Recourse” and “Add Existing File”. Browse and select your images. (if you don’t see the images then make sure you have the image filter selected.)

We now have a folder that seems empty in our “Solution explorer”. To be totally honest you don’t need it. You can add files to your recourse from anywhere on your file system. But I think it’s good practice to keep your project files in your project.
Change button definition
In the original tutorial, we created a class “MyButton”. That class needs some changes. To be exact you need to add to lines to the function “SetupButtonDefinition”. Change it to look like this:
Private Sub SetupButtonDefinition()

    Dim conDefs As ControlDefinitions = _inventor.CommandManager.ControlDefinitions
    _settingsButton = conDefs.AddButtonDefinition(
        "MyButton DisplayName",
        "MyButton InternalName",
        CommandTypesEnum.kEditMaskCmdType,
        Guid.NewGuid().ToString(),
        "MyButton DescriptionText",
        "MyButton ToolTipText")
    AddHandler _settingsButton.OnExecute, AddressOf MyButton_OnExecute

    _settingsButton.StandardIcon = PictureDispConverter.ToIPictureDisp(My.Resources.MyImage16x16)
    _settingsButton.LargeIcon = PictureDispConverter.ToIPictureDisp(My.Resources.MyImage32x32)
End Sub
The magic is in the last 2 lines of the function. Notice that I used the file name of my images here. You need to change them to your image file names.
Now press "Run" (or press F5) in Visual Studio and try your addin and have a look at the button image!